

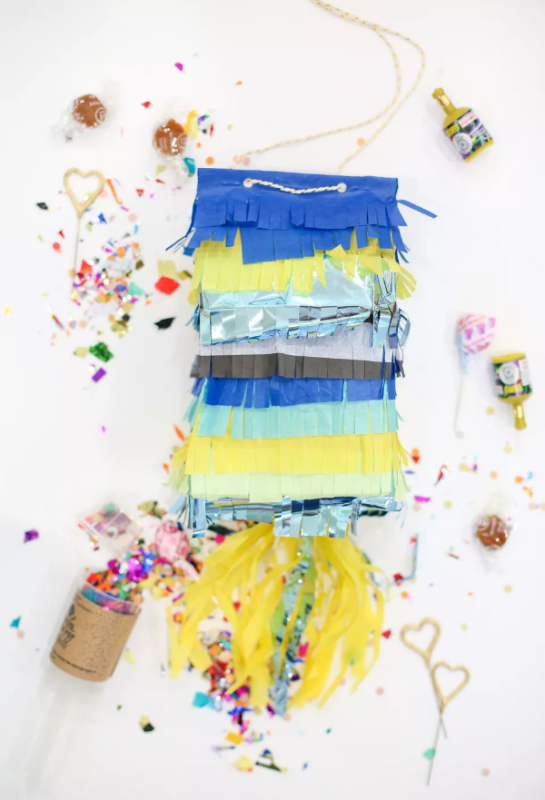
This project is perfect for celebrations of all kinds, and you can probably make it with things that you have around your house. A Paper Bag Piñata DIY is fun, festive and totally simple to make. You can customize both the outside and the inside to fit your theme–and you can use them for so many occasions. We customized ours for a fun New Years party with sparklers and party poppers, but you could fill them with any prizes you like.
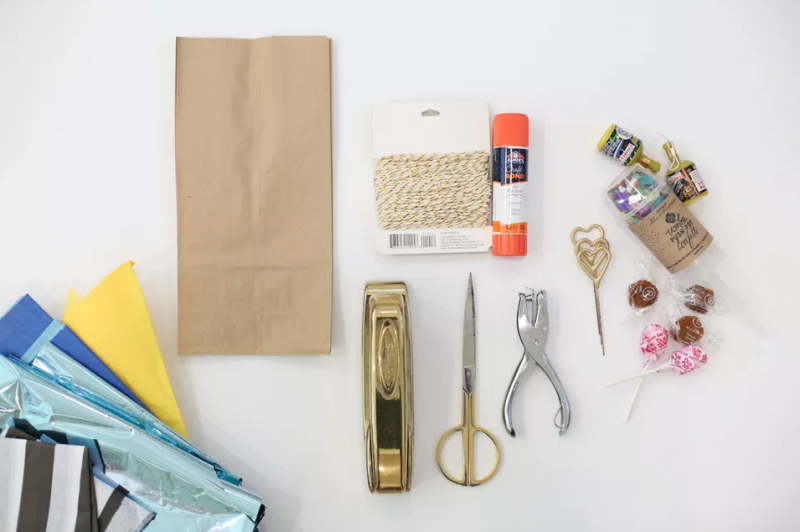
Supplies Needed
- Paper bag (or large paper grocery bag)
- Tissue paper in various colors
- Glue stick
- Scissors
- Hole punch
- Stapler
- Candy and treats
- Twine or thin rope
1. Fill the Bag
Start by putting your candy or treats in the bottom of the bag. Only fill it about halfway or the bag will be too heavy. Over the top of the treats, crumple up some extra tissue paper to give the top half of the bag some shape. Neatly crease the top of the bag over itself once and then once again. Staple the creases shut. Use more staples if you’re using a larger grocery bag.

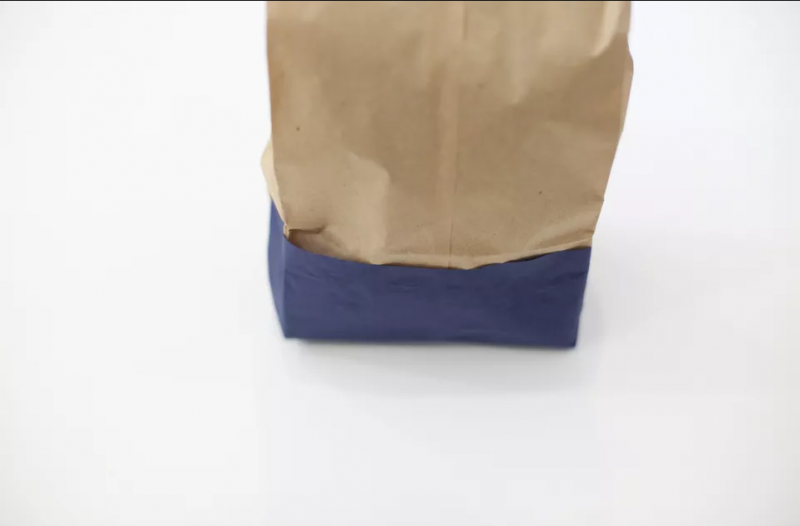
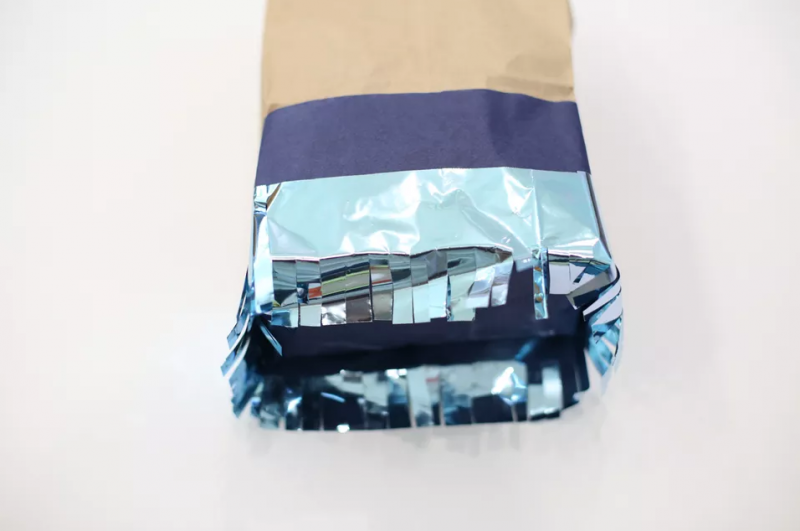
2. Cover the Base
Cut a piece of tissue paper that’s about two inches wider on all sides than the base of the bag. Spread glue stick all over the tissue paper to adhere it to the bag. Once the tissue paper is covered in glue, use the paper to wrap the bottom of the bag and cover it, using a similar technique to the way that you would wrap a gift box.
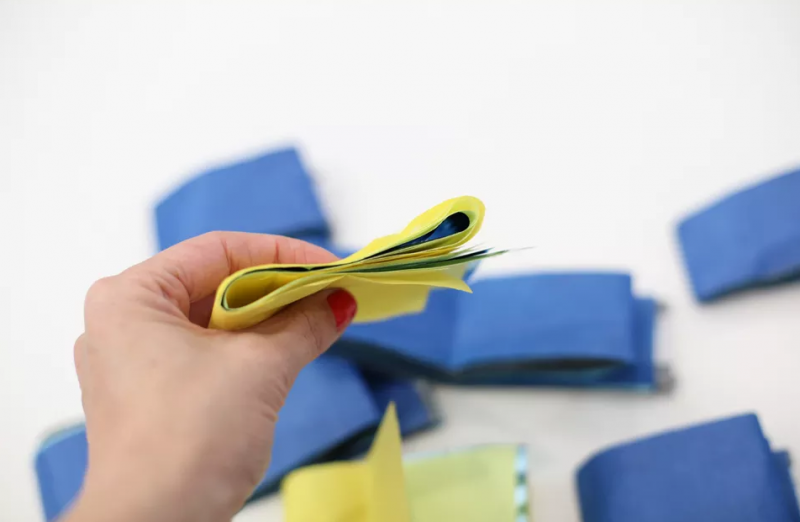
3. Making the Fringe
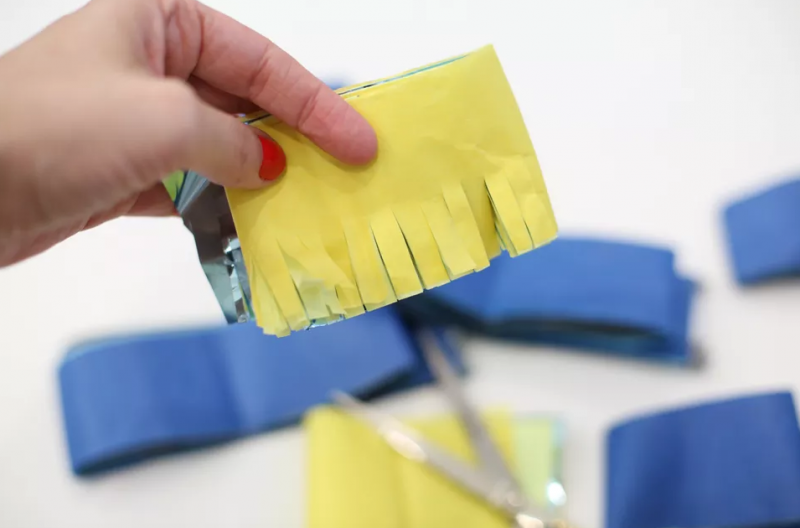
Stack a few pieces of tissue paper on one another so that all of the edges are aligned. Fold them in half, then half again in the same direction, and then a third time. Then cut this into strips of paper that are about 2″ wide. You should end up with lots of 2″ strips of paper folded over each other. Use your scissors to create fringe along one edge of each folded clump of paper. Fringe approximately 1″ of paper, and leave 1″ uncut.
Unfold all of your fringed tissue paper. Spread glue stick along the un-fringed area of one strip of paper.
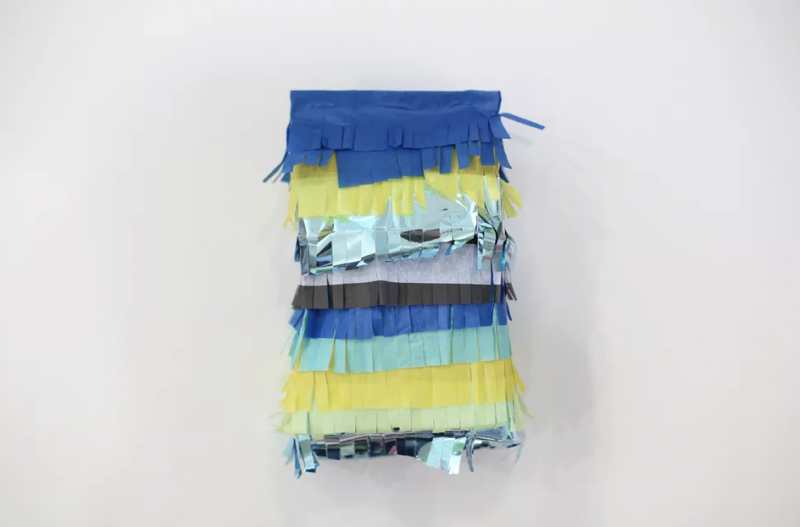
4. Cover the Bag
Starting at the base of the bag, wrap your length of fringe around the bag and adhere it to the base. If your fringe isn’t long enough to wrap around, glue another piece on to continue the line so that it meets itself back around the bag where it started.
Continue in the same manner, overlapping layers of fringe so that the uncut portion of each strip is hidden. Wrap the bag in this way until you reach the top.
5. String it Up
For a paper lunch bag, punch two holes in the top of your bag. If you’re using a larger grocery bag, punch a few extra holes for added security.
Cut a length of twine or thin rope and weave it through the holes. Use the twine to tie up the piñata wherever you’d like.

Time to party! This piñata breaks open a little differently than a traditional one, but it’s just as fun! Once the goodies come flying out be prepared to fight for your share.
Clever, timely. Well done. Great imagination and craftsmanship.
I absolutely love all my Charmpop purchases, they are truly the most special and spectacular cards ever!
These cards are so very beautiful and special! They have wonderful customer service too!!
Everything was packed nicely, card looked very nice, and came as promised. Thank you!
I’ve been purchasing these cards for some time now and have always been impressed with the quality and fast shipping. Highly recommended!
Arrived in good time, recipeant very pleased, fine quality.
Great idea! Sure the kids will love it
Very Creative!
I searched google and found your website, your products are so awesome!!!
Very colorful. Nice idea!
Stuff some candies inside n this could be a nice gift wrap too.
Will be perfect for my son’s birthday party. I might change a bit on the color choice because my boy is more into green.
I love this idea
You got a nice collection of tutorials on this website. Highly appreciate!