This Mother’s day kirigami card tutorial will satisfy any mother or mom-to-be. A flat card blooms into a three-dimensional arrangement that’s much more unexpected than a vase of roses. It looks intricate but takes only some snippets of paper and cleverly placed tape to create.
This project may seem complicated at first glance, but once you follow the instructions here, you’ll realize just how easy it is to re-create.
MATERIALS
- Text-weight paper
- Glue stick
- Double-sided tape
- Card stock
STEPS
- Cut seven 4-inch squares of paper in desired colors. Fold a square into quarters. Fold down 1 flap diagonally; flip the square of paper over and fold down the other flap, forming a triangle as shown. Print petal template; trace it onto the triangle, and cut out. Unfold, and cut 1 petal from flower; close gap by overlapping petals on either side and securing with glue stick. Repeat with other squares.

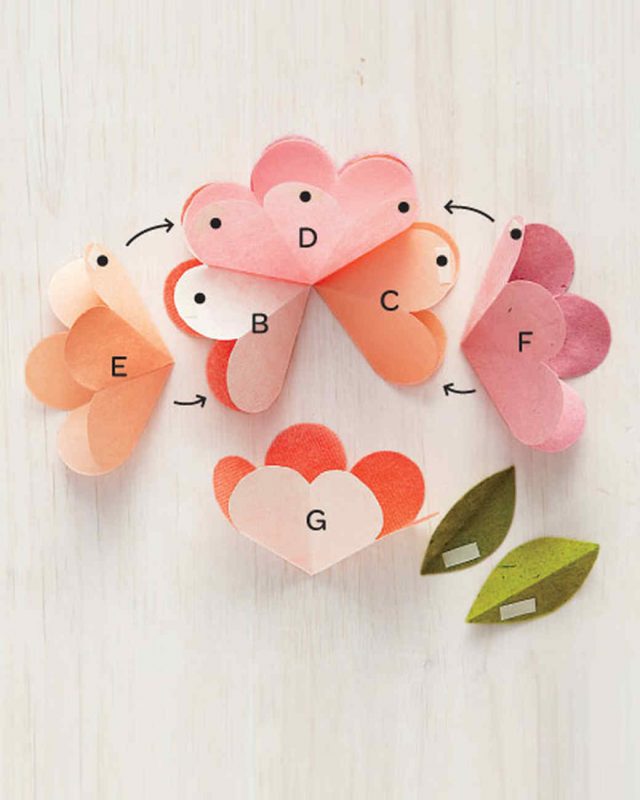
- Attach pieces of double-sided tape to petals, as indicated by dots. Start sticking flowers to one another: Flowers B and C each overlap a petal with A; then flower D goes on top, completely overlapping A.
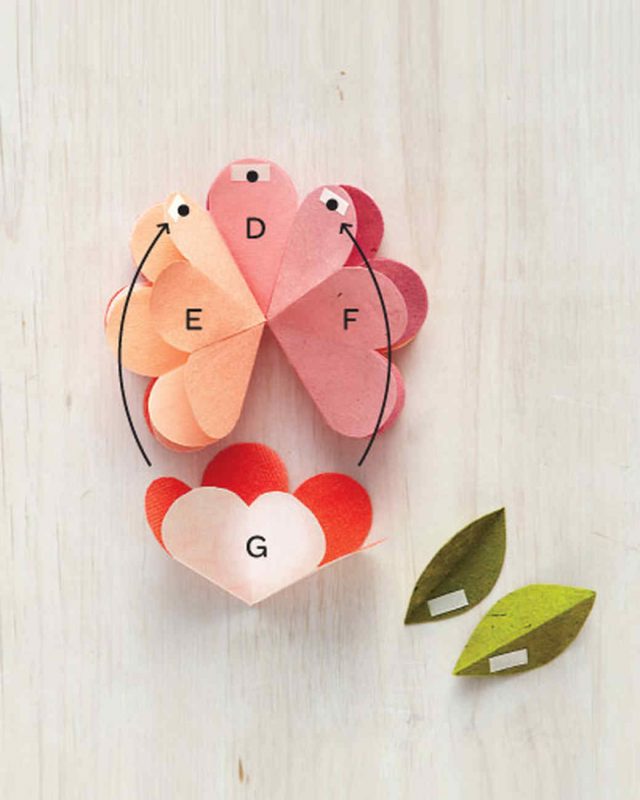
Attach flowers E and F to the stack to overlap B and C.
- Attach G to the top, overlapping D. Cut out some freehand leaves from green paper, place double-sided tape on the bottom, and attach them to the flowers.
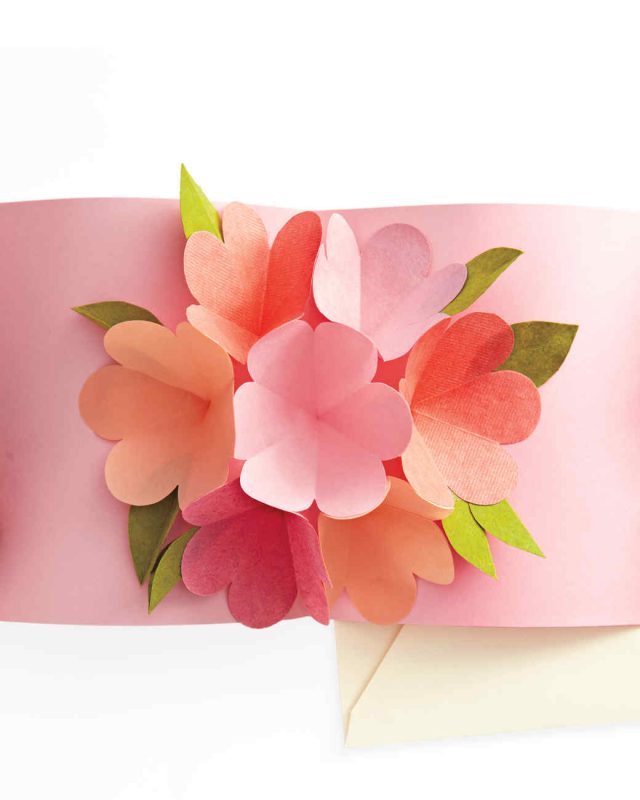
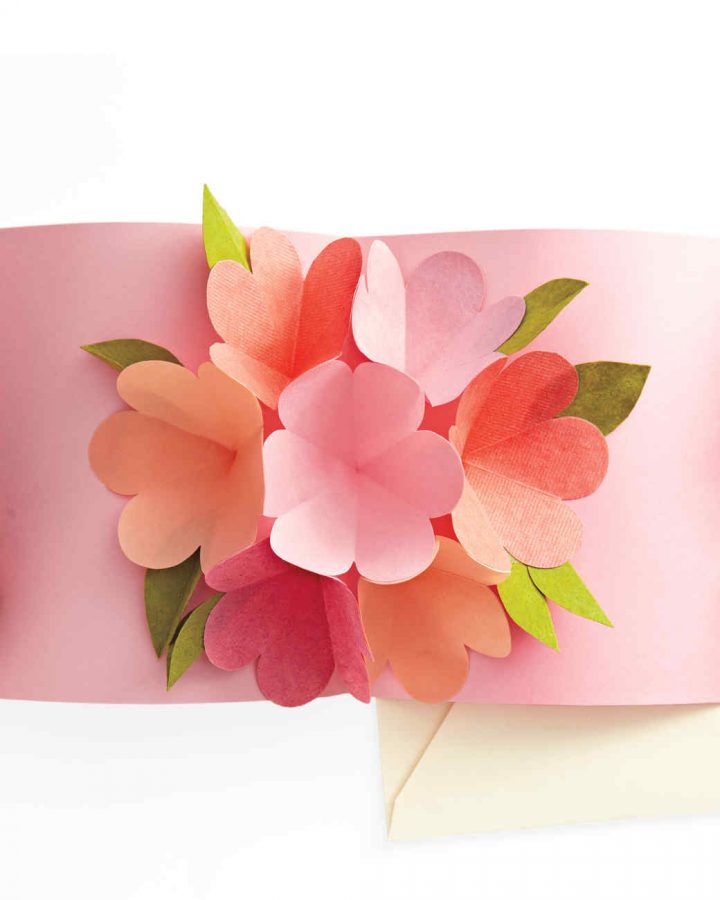
- Cut a piece of card stock into a 10-by-6-inch rectangle, and fold in half to form a card. Place the folded flower stack inside of the opened card as shown. Place a piece of double-sided tape as shown; close card, and press firmly to adhere. Open card and repeat, attaching the other side of the flower stack to the inside of the card.