
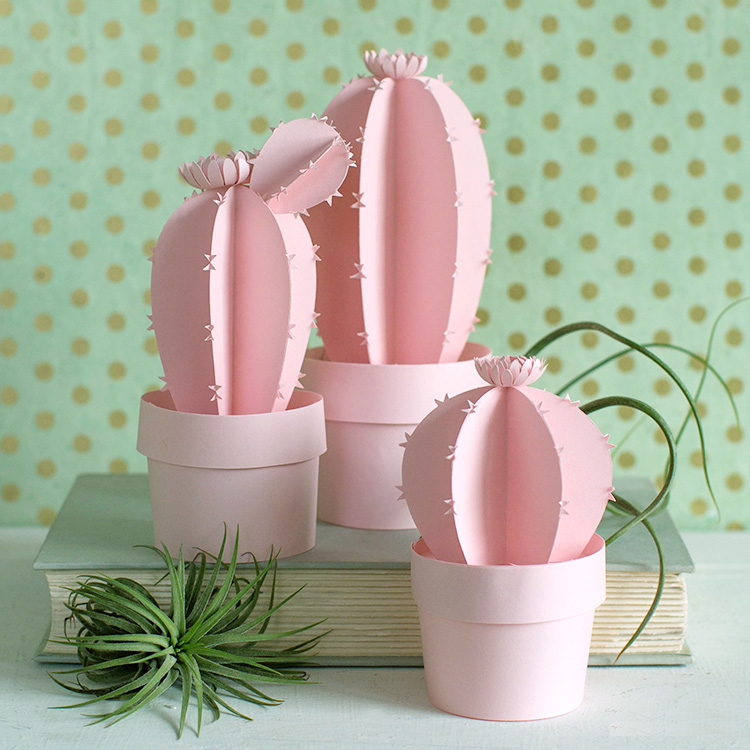
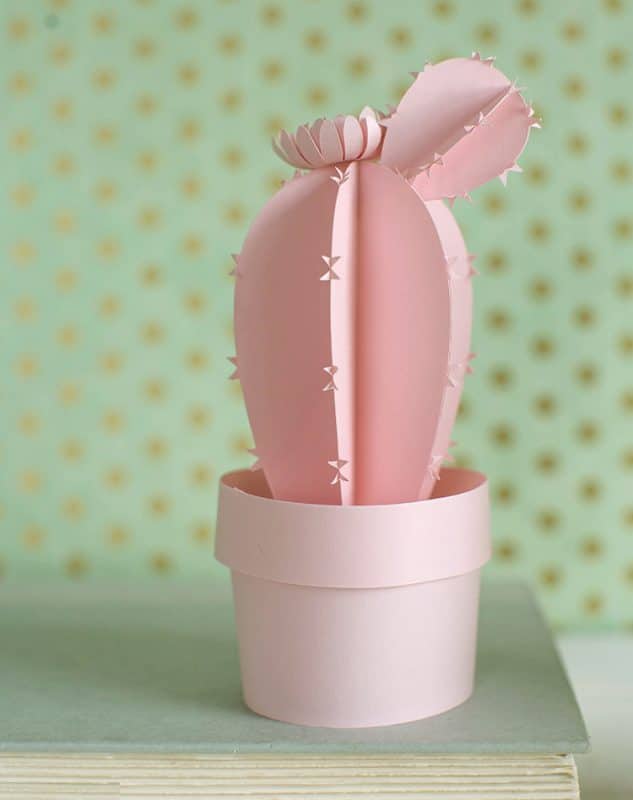
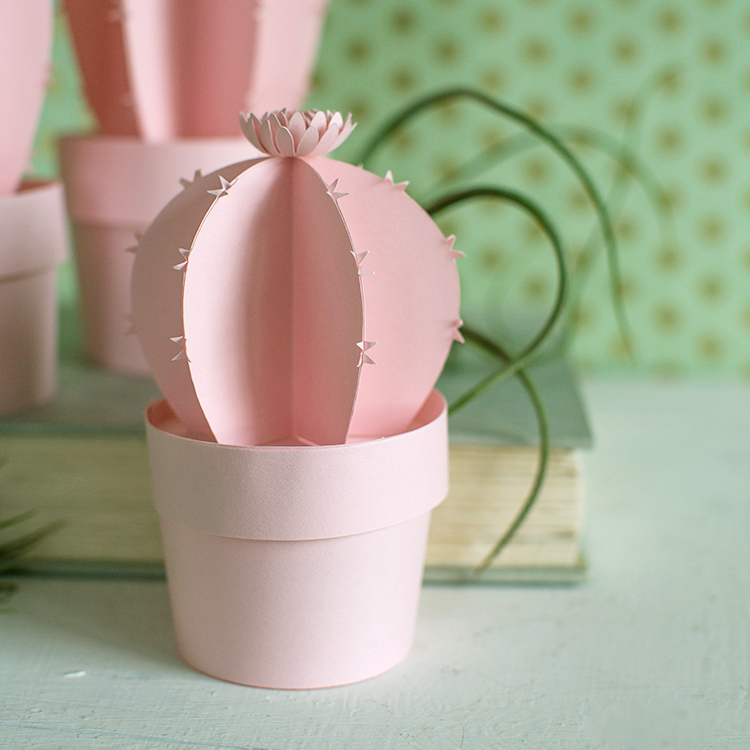
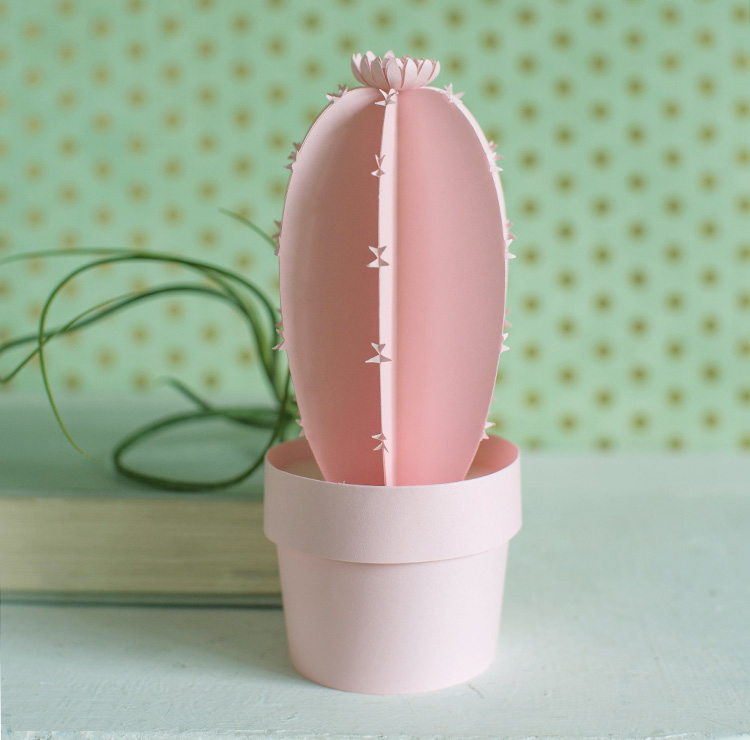
In case you are searching for an adorable yet so so simple papercraft project, this is what you need. These 3D Paper Cactus DIY will bring so much joy to a family weekend night. The beauty of making paper cacti is that you can still have that trendy design element without having to worry about pricking yourself with real cactus spines. For this reason, these would be great as charming little decorations for a nursery or kid’s room. Of course, you can also use these for everyday home or party decor as well.
Tools
- Scissor
- Hot Glue Gun
- Small Paintbrush
- Cricut Scraper or Scissors
Materials
- Text Weight Paper [Pink Lemonade]
- Yes! Paste
- Small piece of Chipboard/Matboard
Steps
- Gather the tools and materials listed above.
- Cut out paper pieces as shown in the picture.
- Fold the cactus piece in half lengthwise, matching the edges evenly.
- Apply Yes! Paste onto one of the outside folded sides of a cactus piece. Use a thin, even coat of paste by smoothing it with the edge of a piece of chipboard or matboard. Layer another folded paper cactus piece on top, matching the outer edges and folded spines. Do not glue the spikey spines together. Repeat a second time to have 3 pieces attached together, like book pages. Repeat this step with the remaining 3 pieces to have two halves to your cactus.
- Glue the two cactus halves together.
- Use a small paintbrush to apply a bit more paste if needed to keep the glued edges down.
- Curl the paper flower petals upward using a Cricut scraper tool or edge of your scissors. Glue together using hot glue with the smallest petal on the inside.
- Glue flower to the top of the cactus.
- Fold the long rectangular piece in half lengthwise. This will be the pot rim.
- Glue the sides of the pot together. Glue the folded rim around the top.
- Glue the two circles together with paste.
- Add a dot of hot glue to the base of the cactus and attach to the center of the circle base.
- Fold open the cactus spines.
- Pop the cactus with base into the paper pot.
Follow our potted paper cactus photo tutorial below for a visual guide to this craft!

Love these….they make our weekend much more fun. It’s a traditional thing between me and my kids that we gather and make craft projects together. This is definitely enjoyable!
My 2 year old nephew loved it
Great idea! Sure the kids will love it
Will do this for my mom on her next birthday
look quite more complicated than what you usually post. But as always, beautiful!
Wow, this is clever. Will make one to put on my window!
Will definitely try this tutorial. Too cute
How lovely are these pink cactus!
I really like the idea.
Great for room decor!