

Not so difficult to make a pop-up box card. Let’s accompany with CharmPop to make one of the cutest cards for your kids on all occasions, especially their Birthday.
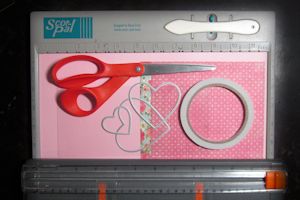
Supplies
Step by step:
Step 1:
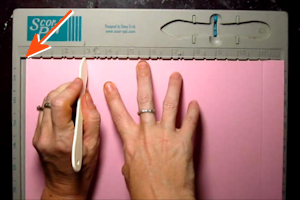
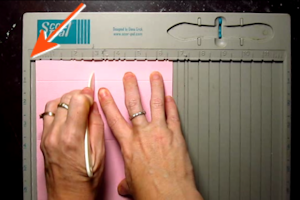
Cut cardstock to 8.5” x 12”. Score on the long side at 2.75”, 5.5”, 8.25”, and 11”.
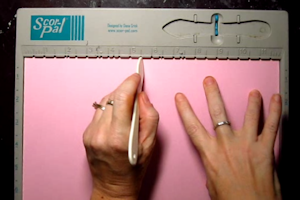
Hint: For scoring boards not marked at quarter inches, score at 5.5” and 11” first. Move the cardstock .25” to the right, then score the other lines at 3” and 8.5”.
Step 2
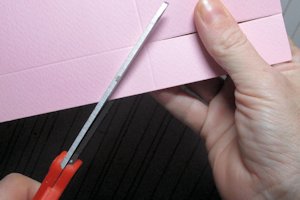
Cut off a 2”x12” strip, and set it aside. This will be used later.
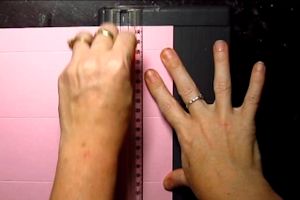
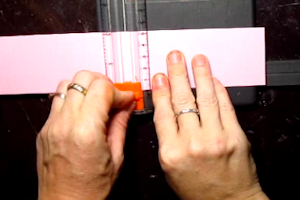
Turn the 6.5” x 12” panel a quarter turn to the left, and score at 2.75.”
Hint: For scoring boards not marked at quarter inches, move the cardstock .25” to the right, then score at 3”.
Step 4:
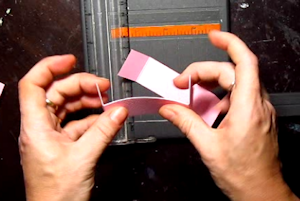
Cut down 2.75” to this scoreline along each of the 4 perpendicular score lines.

Cut the 2”x12” strip at 4.75” from the end with the 1″ score line. Cut the strip in half the long way to create two strips, 1”x4.75”.
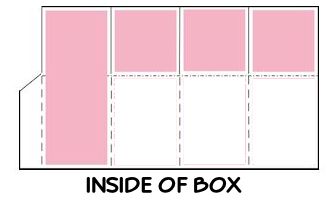
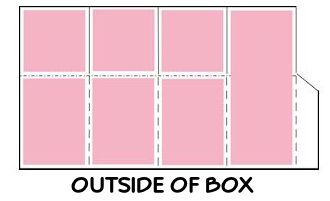
Cut patterned paper to decorate each panel, as follows:
1 inside back panel – 2.5”x6.25”
3 lower panels (outside only) – 2.5”x3.5”
6 upper panels (sides and front, inside and outside) – 2.5” square
Cut one 2.5”x6.25” outside back panel from white cardstock.
Hint: Attach the longest decorative panels to the section next to the tab.
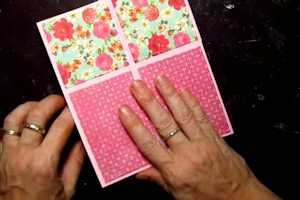
Fold the decorated card on the 5.5” score line, and attach the tab inside with adhesive.
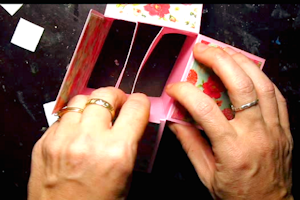
Apply adhesive to the end tabs of the 1”x4.75” strips, and adhere them to the inside of the opened box, aligning them with the top of the opening. Turning both tabs toward the outside front or back of the box will help ensure straight placement.
Hint: Close the box in both directions and secure the score lines to ensure that it will lie flat for mailing.
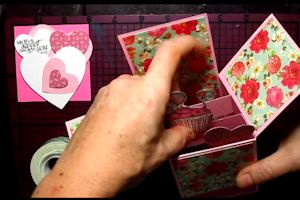
Adhere die cuts, stamped images, and/or other embellishments to the strips and inside front and back of the card. Stick them down lightly at first, as they may need to be repositioned. Inside elements should be placed so that they are not seen when the card is closed.
Hint: A 3″ square sticky note is the approximate size of the visible area to be decorated and can be used as a template to plan the arrangement of the die cuts and other inside elements.

Embellish the inside front flap if desired.
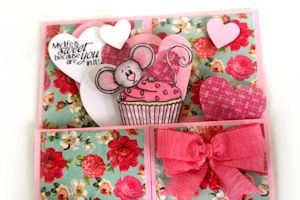
Complete the project.

Resource: https://www.splitcoaststampers.com/resources/tutorials/popupboxcard/