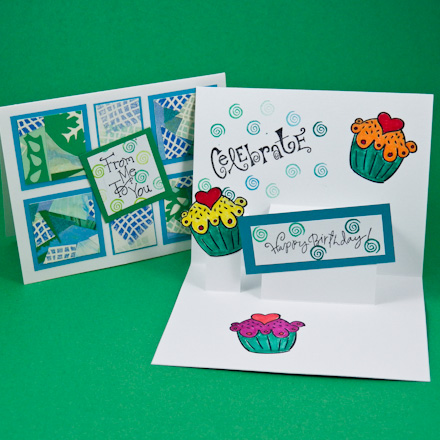
Step 1: Supplies and Prep
To create a simple pop up card, you’ll need two blank cards of the same size, one for the cover and one for the 3D sculpture. The 3D sculpture is made separately and is glued on the card. It’s best to use blank cards of the same color to camouflage the 3D sculpture somewhat.
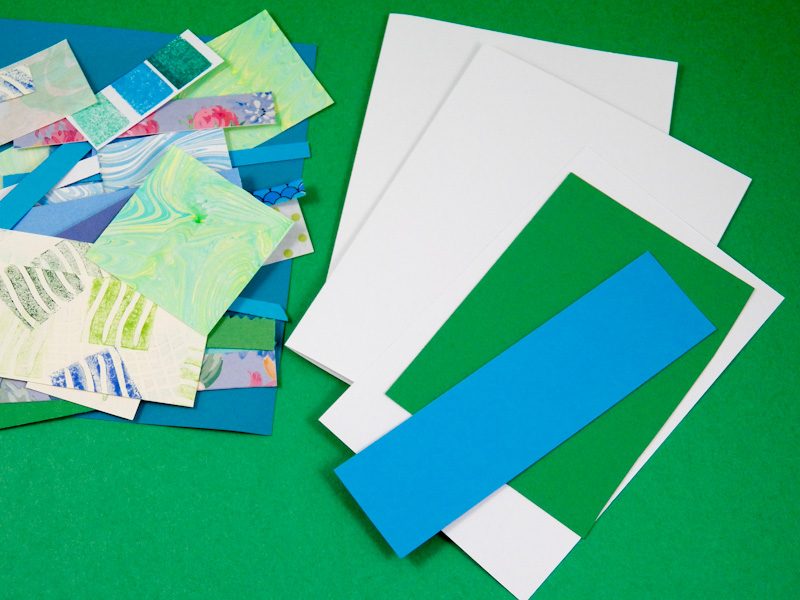
To make stamped pop-up elements you will need white cardstock and colored cardstock formats.
Gather a variety of paper and cardstock that coordinate with the colors used on your card.
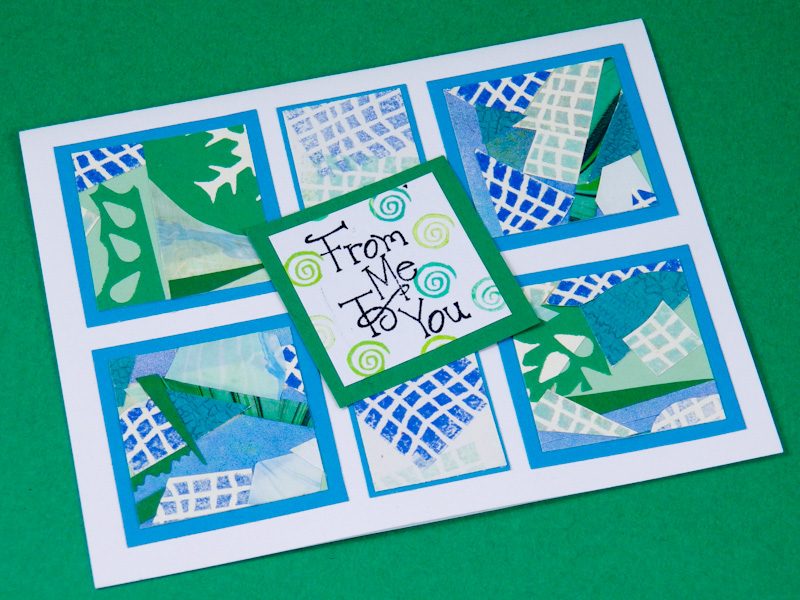
Step 2: Make Card cover
Use one of the blank cards to make the card cover. The card cover can be made using any technique you like; however, it is important that the card have a horizontal aspect to make the most effective use of the step pop-up. Set aside the completed card cover while you make the pop-up.
Step 3: Make Pop-Up Elements
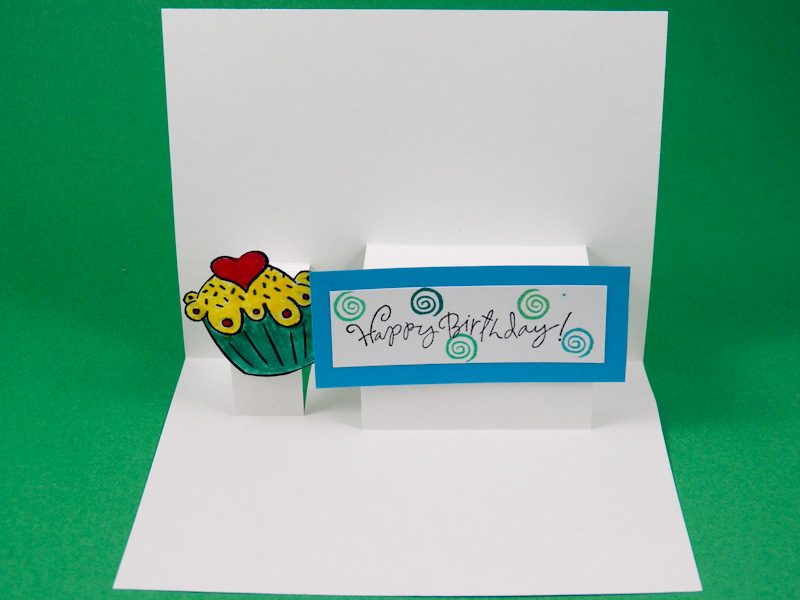
Pop-up elements are glued to the pop-up steps/platforms. Anything that is flat and will fit inside the folded card can be used. For the sample card, a stamped, matted message card and a stamped cutout are used. Your matted message card should be about 1¼” to 1½” by 3¼” to 3½”. The cutout can be up to about 2″ square.

Tip: Use felt-tip markers to color the stamped image and tiny rubber stamps to decorate the message card.
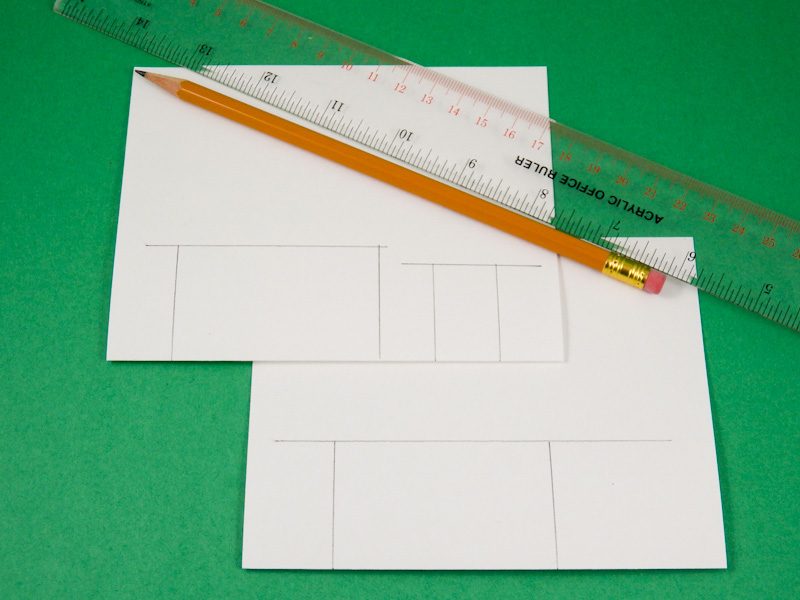
Step 4: Make Step Pop-Up
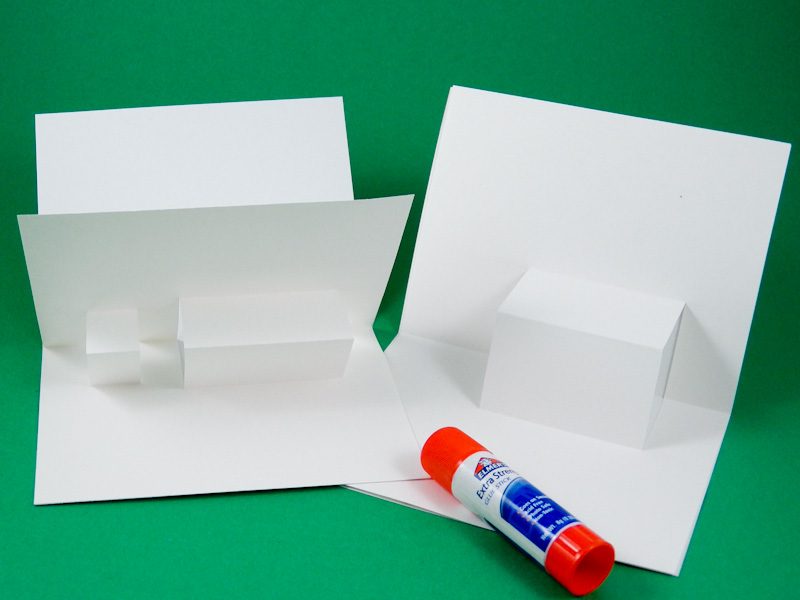
+Use the second folded blank cards to make the pop-up mechanism. To form the pop-up steps/platforms, you will cut parallel slits from the folded edge of the blank cards.
First, use the pencil and ruler to draw a line 1½” from the folded edge and parallel to it. Next, draw two vertical lines from the first line to the folded edge—they should be about 2½” apart and parallel to each other. The left line should be about ¾” from the left edge of the blank cards.
About ¾” to the right of the first step, draw the second step. Draw a line 1¼” from the fold with vertical parallel lines that are ¾” apart.
Tip: For a simpler pop-up, only make the first step. It can be drawn anywhere along the fold, but no closer than ¾” from either side.
Tip: Skip the measuring by using templates. See the side bar to the right for details.
Cut on the vertical lines from the folded edge to the drawn horizontal line.
Fold the cut steps on the horizontal line between the cut lines. Unfold.

Open the blank cards and push the steps through to the other side. With the pencil lines on the outside, fold the blank cards at a 90° angle. You will be gluing the pop-up elements to these steps/platforms.

Step 5: Test Pop-up Mechanism
Test your pop-up mechanism by making sure it folds flat. Also, use repositionable tape or glue to attach the pop-up elements to the pop-up steps. Fold the pop-up flat and make sure the pop-up elements do not extend beyond the edges of the folded card.
Make any adjustments needed before proceeding.
Step 6: Glue Together
Glue the pop-up mechanism inside the card cover, being sure to align the edges. Apply glue to one side of the pop-up, avoiding the step, and slip it inside the card cover. Apply glue to the other side and fold the card cover over onto it.
Open the card and allow the glue to dry.
Step 7: Glue Pop-Up Elements and Finish Card
Glue the pop-up elements to the steps. Decorate the card behind and around the pop-up steps. You might stamp more images of the cutout, add a greeting or write a message. Use your imagination!